
KX-KDX Hybrid Airbox options


Hybrid airbox for sale HERE:
Connecting an air box / air boot to the KDX engine is one of the challenges in building a KX / KDX hybrid. My opinion is the alignment of the swing arm pivot bolt and counter-shaft is the first priority. Once the engine is properly fitted in the frame, then dealing with the air box / air boot comes next.
There are a few choices. The easiest solution is to use the KX air boot (the 250 boot fits better than the 125 boot) with the KX airbox and the KDX carb. The KX carb is several mm’s larger in diameter than the KDX carb, so you would need to clamp the KX boot down to the KDX carb as tight as you can and hope for the best. The ease and simplicity of this option comes at the price of a potential source of an air or debris leak into the engine.
If you are still set on using the KX boot but are concerned about the fitment to the carb, there are an additional two options. You can make a spacer ring and modify the KDX carb to accept that ring so it will fit the KX boot properly (search KDXRider.net for pictures). You could also modify a KX carb to fit the KX engine. Neither of these options appealed to me. I wouldn’t want to permanently modify the KDX carb to where it wasn’t usable on a KDX. For example if I wanted to switch to a Lectron carb, no one with a KDX could then use my regular carb. And using a KX carb would be a unpredictable in terms of performance and jetting it correctly would take some time and new brass.
The path that I have always gone down is keeping the KDX carb and using only boots that would properly seal to the carb. As you can see in the below pictures, using a Honda boot or the KDX boot involves making plates to position the boot correctly in the air box. While this takes extra time and effort, it does allow the boot to align perfectly so there is no bending, compressing or distorting of the air boot.
Honda CR air boot / Honda air filter / KX air box
I got most of what I needed from this auction:

(click picture to enlarge)
Here are all the parts to put this together:

(click picture to enlarge)

(click picture to enlarge)

(click picture to enlarge)

(click picture to enlarge)

(click picture to enlarge)
Plenty of room around the shock:

(click picture to enlarge)
And best of all no modifications to the carb or boot for a proper seal:

(click picture to enlarge)
More pictures can be found HERE.
KDX air boot / KDX air filter / KX air box
This combination was fairly easy with the help of a router table. Without the router table, you wouldn’t be able to pull some of this off with just hand tools. A machine shop would be the best bet.
The heart of this combination is this item:

(click picture to enlarge)

(click picture to enlarge)
Why did I make this? There is a flaw with the plastic KDX filter holder (at least that is what I call it). Maybe this flaw occurs over time as the plastic warps, or maybe it was there from the start. Either way, it doesn’t really matter.
The following picture shows this flaw – the plastic is warped near the filter holders mounting bolts. In between the mounting bolts, there is no gap between the filter cage and filter holder. But at each mounting bolt, a gap exists between the two. The gap increases as you tighten the nuts on the mounting bolts when installing it in the air filter box:

(click picture to enlarge)
I started with a piece of 1/4″ aluminum. Made the rough cuts with a jig saw and then finished it up on the router table.
Comparing the custome piece to the factory KDX piece:

(click picture to enlarge)

(click picture to enlarge)
The groove keeps the KDX air boot from needing to be modified (as you’ll see in the 2nd approach down below):

(click picture to enlarge)

(click picture to enlarge)
I thought about threading the filter holder and using the KDX air filter bolt, but I wasn’t confident that a 1/4″ was enough material, so I made a post instead. The bolt, nut and washer are all stainless steel. With the filter cage being plastic, I was concerned that I could over-tighten the wing-nut and compress the plastic filter cage too much. After cutting the plastic spacer to the correct length, the nut acts as a stop against the filter cage and prevents overt-tightening.

(click picture to enlarge)

(click picture to enlarge)
Now I just needed to make some adapters to put this all together. I used some thinner aluminum for these adapters and this is everything I needed to put it all together:

(click picture to enlarge)
The following are just some pictures showing how it all goes together:

(click picture to enlarge)

(click picture to enlarge)

(click picture to enlarge)

(click picture to enlarge)

(click picture to enlarge)
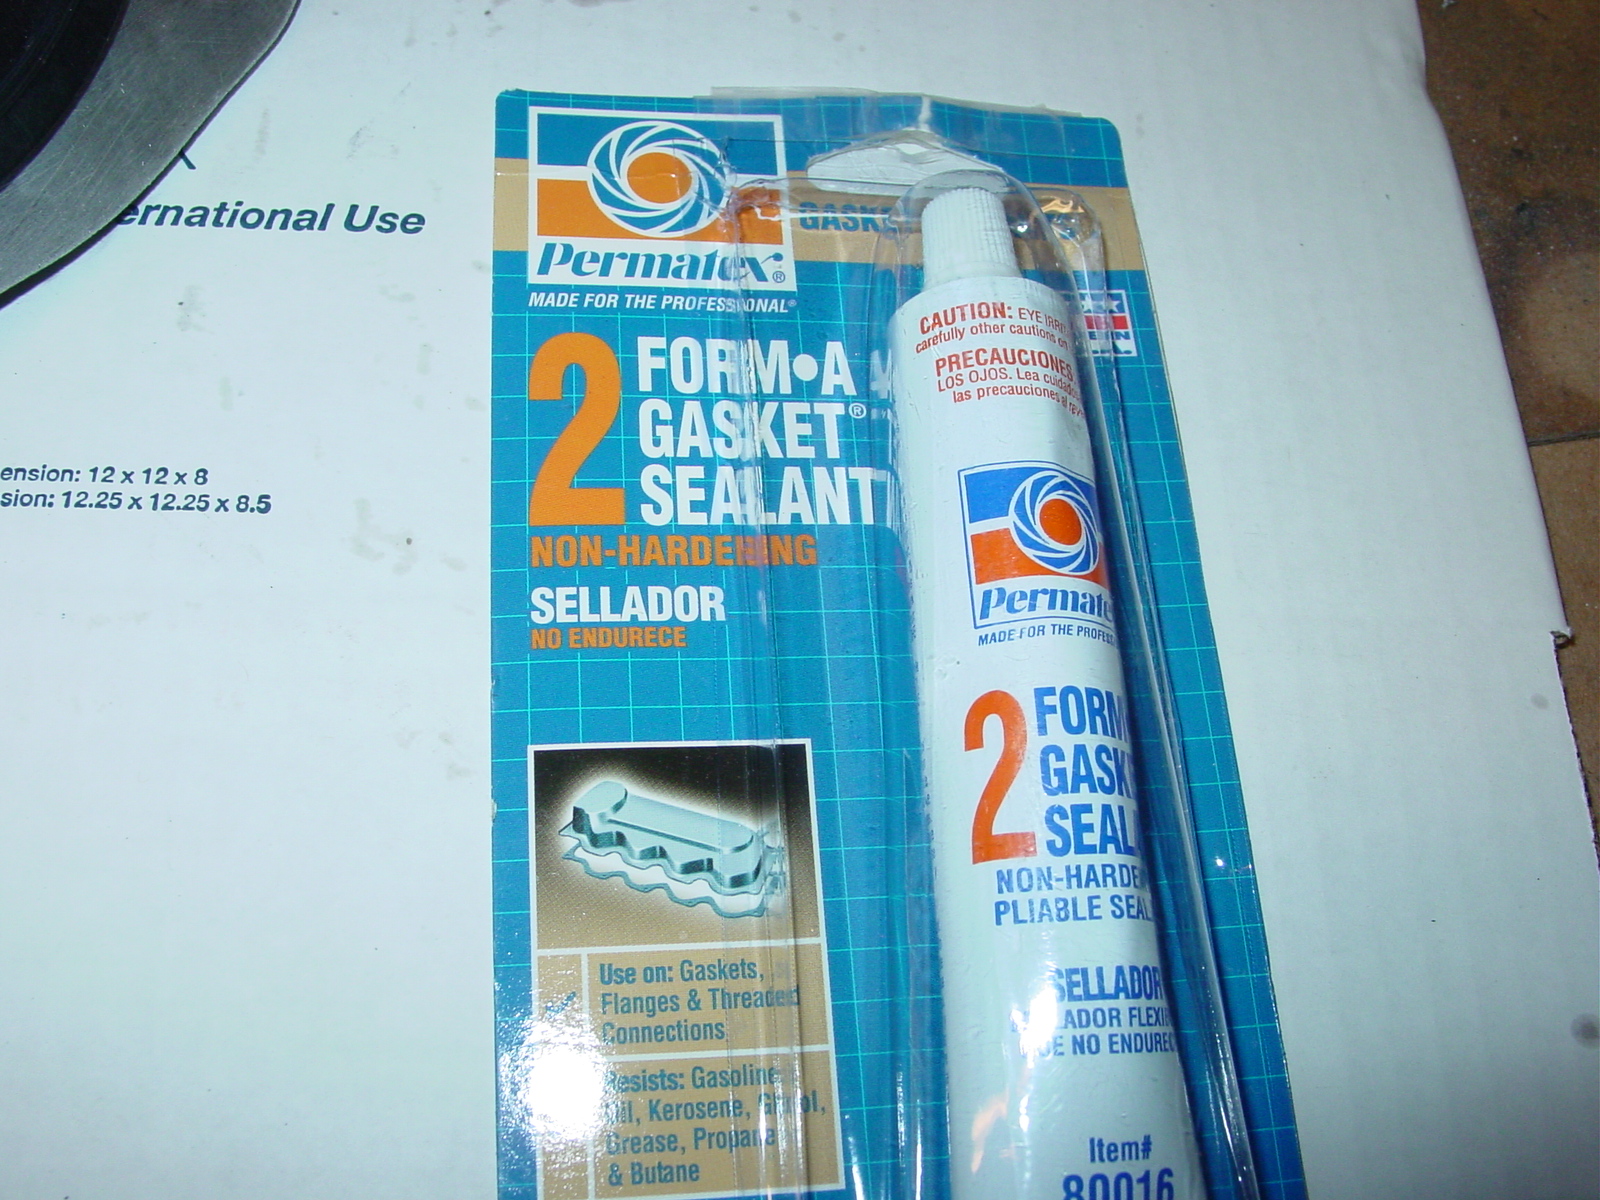
In an effort to maintain my “overboard” approach to things, I used this stuff to seal the air boot and air filter holder. It isn’t “permanent” like RTV, but with effort it will come off with a chemical solvent:
(click picture to enlarge)

(click picture to enlarge)
And there it is with the neoprene seal all ready for an air filter:

(click picture to enlarge)

(click picture to enlarge)
I recently put this combination to the final air filter test.
___________________________________________________________________________________________________________________________________________________________________
KDX air boot / KX air filter / KX air box
The basic concept is sandwiching the KDX boot between two pieces of aluminum plate and then securing that to the KX airbox.
First step is to cut-out the two pieces of aluminum plate.

(click picture to enlarge)
The next part is doing some trimming on the KDX boot. There are ridges on the sealing edge of the boot that I trimmed off with a razor blade. It turned out to be tougher than expected to cleanly trim the ridges off, so the end result is pretty ugly. But I’ll be using black RTV to seal everything up, so any high/low spots will get taken care of.
I also had to cut off some of the edges near the bolt holes because they would extend too close to the edges of my aluminum plates. Below is what the boot looks like after all the cutting and trimming.

(click picture to enlarge)
I’m going to cut out a recess on both plates that the sealing flange of the boot will sit in. I took my time positioning everything to make sure I had the boot sitting in the plate correctly. After triple checking everything, I traced the outline of the boot on the plate.

(click picture to enlarge)
This is what I’ll be working from now that the boot is removed.

(click picture to enlarge)
After spending some time with a router, this is what this plate looked liked. I repeated this procedure for the other plate.

(click picture to enlarge)
The KX cage needed to be modified to accommodate the additional thickness of the aluminum plates I’m using. I needed to remove the bolts that are used to secure the KX airbox together. Drilling out the head of each bolt was the easiest way to do it.

(click picture to enlarge)
All bolts removed.

(click picture to enlarge)
I used longer stainless steel allen head bolts.

(click picture to enlarge)
This is the other side of the cage. It has been painted and ready to go.

(click picture to enlarge)
Ready to put it all together. First step is to put the cage bolts through one of the plates. The little spacers shown two pictures above sit flush with the plate.

(click picture to enlarge)
Other side.

(click picture to enlarge)
Next step is to put the boot into the other plate.

(click picture to enlarge)
It was a warm day when I was putting this together and the RTV was curing faster than I expected. I couldn’t stop to take pictures of the remaining steps but it is pretty straightforward. I used a lot of RTV on the surfaces where the two aluminum plates join together. Then I put those two pieces together and then installed that assembly into the KX airbox. To finish it off, I made a trim ring that fits over the bolts on the outside of the airbox and then used nyloc nuts to secure it all together.
Here are a few shots of the finished airbox.

(click picture to enlarge)

(click picture to enlarge)

(click picture to enlarge)


Leave a comment